
I followed ELS's suggestion and took a tuck across the back from armhole to armhole and this adjustment did straighten out the side seam. I also adjusted the back cap of the sleeve pattern the same amount as the tuck in the back of the coat. Since I had already cut my sleeve prior to the first fitting, I just sewed this adjustment in as a dart and will correct the pattern once all fitting adjustments are made. Another adjustment I made was that I took in the front princess seams starting at the waist and tapering in 1/4" to the hem removing a total of 1" from the front since I felt that the muslin was looking too baggy in the front. I am pleased with this adjustment. I also realize that I need to add some length to the front since it appears a little shorter than the back. I am wearing a suit jacket under the muslin in all pictures. I have to add that I have found taking pictures of the muslins a valuable fitting tool. Pictures show so much more than my eye sees in the mirror.


With shoulder pads


Saturday, July 5, 2008
Marilyn B 2nd Fitting, Vogue 7978
Melissa's second muslin
Marji's analysis of my first muslin is here.
I first folded up the muslin and raised the waist to match my natural waist. Then I let out all the vertical seams by 1/4" (except in the front and back above the bust). Then I raised the shoulder seam by about a 1/2" (I didn't have enough seam allowance to let it out any more). And then I slit my second sleeve down the centre and added about and inch throughout the whole length.
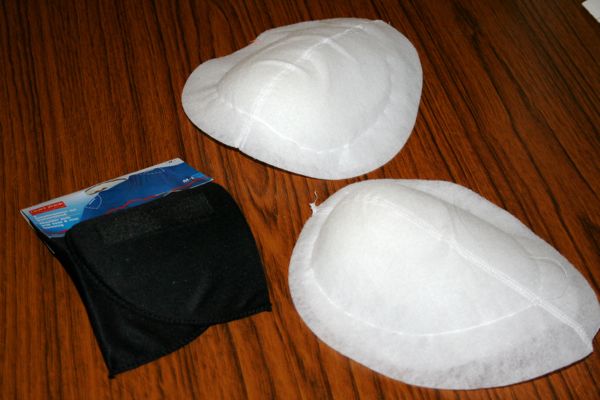
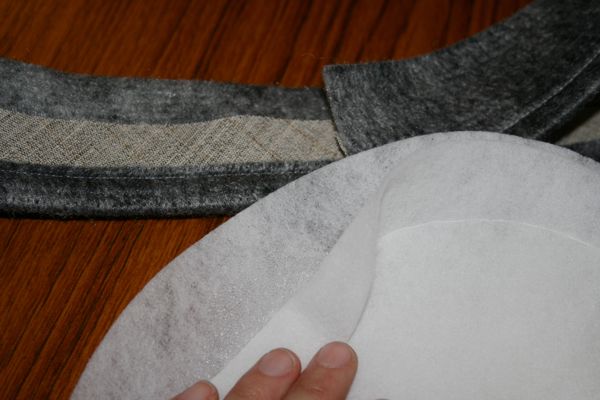
In these photos I'm wearing a thick fleece and my new shoulder pads (details below):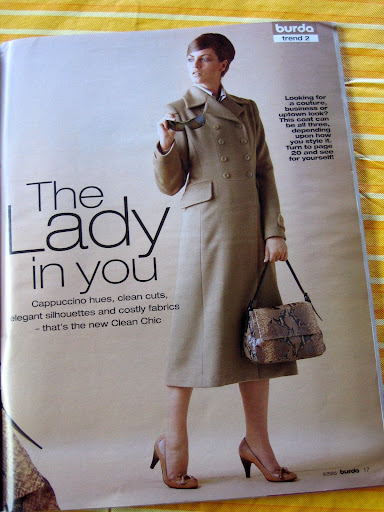
(NB: the wind is blowing the walking slit open in the last photo, disregard that)
I'm really happy with the fit of the sleeve now - it doesn't pull when I raise my arm and the bicep is much looser. I think I could still raise the shoulder a little bit more, so I'll cut the seam allowance a 1/2 wider in the final.
I'm still not sure about the body fit, though. It feels like a bit of a sack, and doesn't really have a defined waist at all (though frankly, it didn't much before either)...
Oh, and I took the day off on Thursday and did a bunch of shopping through the good haberdashery shops that are usually only open during the working week. I got some fabulous shoulder pads from MacCulloch and Wallis for £2, and sleevehead from Kleins for £1 a metre! I've got detailed shopping info on fehrtrade.com, and both places sell those bits online, too.
Wednesday, July 2, 2008
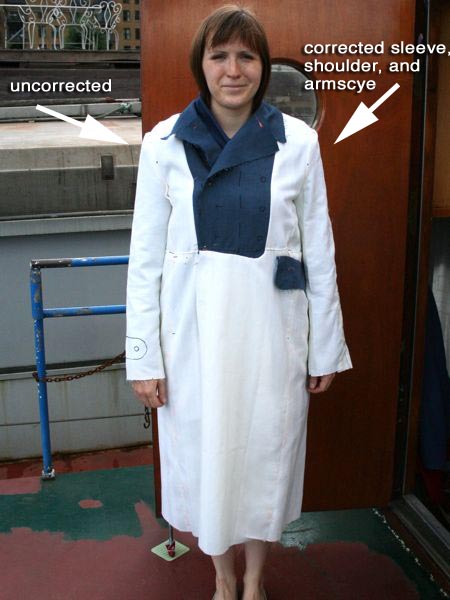
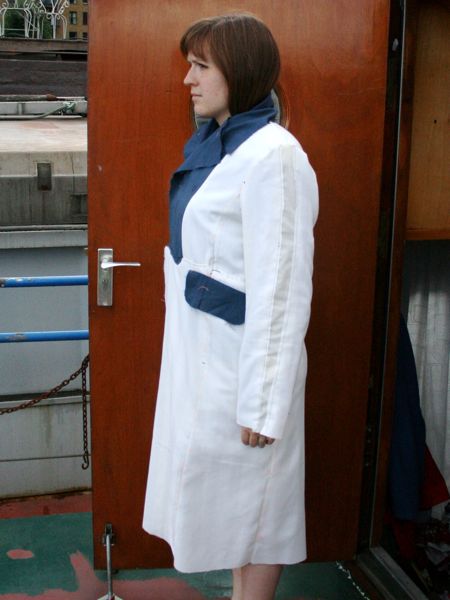
NancySeattle's rough muslin (first set of refinements)


To Nancy from Marji,
Your muslin needs quite a bit of work before you can start to cut into the wool - don't be discouraged, this is a great learning opportunity and we'll get you through it, and you'll end up with a great fitting garment and a lot of knowledge about how to fit your body.
I am, as you are probably aware, out of town with limited computer access. I just posted a comment, but then I went in and looked more at your pictures. You have different things going on in different pics.
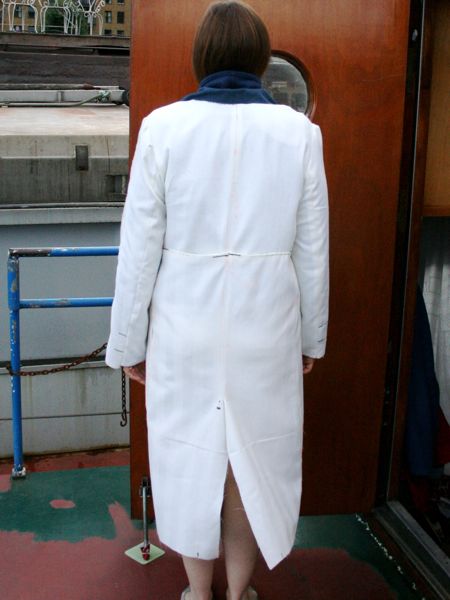
I believe that one of the reasons in the front and full back pics it looks as if there is too much fabric toward the neckline is that the coat is riding up in order to get to where there is enough room - I also believe that you have too much length in your bodice, and that you'll need a petite adjustment - taken as a full tuck, same as I directed for Rosemary. I'll link to the flickr pics in a minute.
At this point, I'm going to suggest steps.
1, let out all of your vertical seams, including side seams. It's too tight and is pulling everywhere. Don't worry about the shaping, we can add that back in later, but right now it's got to get to the point where it can hang well without riding up.
2. Mark your buttonhole placement on your fronts so that when you pin it together you can pin the buttonholes together. I'm not at all certain if you have pinned it together on your CF or your fold lines in your photos
3. take a petite alteration across the front and back (you will need to do this to the sleeve cap also). See here on how I recommended for Rosemary and she did it and got back to me that it was exactly what she needed to do.
4. Try it on again, and if it isn't riding up everywhere, take a new set of pictures, and then we can take a look at it and see if you do indeed need a fwd neck and fwd shoulder alteration.
Tuesday, July 1, 2008
Lindsay T: Source for Professional Fusing of Fabrics
If you have access to the garment district in New York, you need to know about Quick Fuse & Cut. This is the resource that design houses and clothing manufacturers go to when they need to have their fabrics fused. Since I am making my coat out of boucle, I needed to fuse my underlining to the boucle to give it some needed stability. Marji told me how to do it myself, but with my Rowenta Professional it would have taken a loooong time.
Fortunately I had heard about this place from an FIT grad student who waited on me at Mood Fabrics not so long ago, plus Ann Steeves recommended it to me as well. Today I had my three yards fused with my fusible underlining and they did a great job. And it only cost me $10!
You can visit my blog for photos and more on Quick Fuse & Cut.
Claire S. - V8346, questions re: sleeves
I can hardly believe it, but I have been working on adjustments all week and think I managed to make the body of the muslin fit - but before I post more pics, Marji mentioned putting in the sleeves and collar.
The suggested sleeve to use is a 2-piece - this pattern has a 1 piece sleeve.
For those of you who are also making V8346 - Are you using the 1 piece sleeve or are you using a sleeve from another pattern ?
I also have the McCalls pattern M5247 which has a 2-piece sleeve - how do I know if I can use this sleeve pattern in my coat ? I don't know what to measure or how to tell if it will fit.
Any help would be appreciated.
Monday, June 30, 2008
Index for Fitting the Muslin (Toile) posts
Thoughts on the Muslin (or Toile) is here
Constructing and Fitting the Muslin Part 1 is here
Constructing and Fitting the Muslin Part 2 is here
Check out the poll on the sidebar and fill in which style pocket(s) you'll be making
Digs' Vogue 1266 "Siege of Stalingrad" coat


This pattern (Vogue 1266, view B, the double-breasted blue) is wonderful. I love everything about it - the length, the perfect waistline placement, the ease all over the body, the length, the swishiness of the skirt. It'll be a fabulous coat.
It has two issues with respect to my own quirks & needs:
1. That straight back thing. My neck is pushing the coat backwards - and this is apparent from the far-back position of the shoulder seams. My inclination is NOT to do the straight back adjustment, because it would shorten the back but leave the side seams where they are, and I'd then have to move them forward, probably as much as 1" (also in the lining pieces). MY inclination is to deepen the back neck and cut the collar piece a little longer to compensate for the extra neck seam length. Not such a bad idea since this coat's going to have jackets & winter scarves under it. This would automatically allow the coat to shift forward & get the shoulder seams where they should be. Could someone please weigh in on the overriding wisdom of one over the other????? :-)))))
2. For a presumptive winter coat, the sleeves are ridiculously narrow. Gorgeous, but wayyyy too narrow. I checked the widest part of the sleeve in my existing winter coat: 24"! This coat: 18.5"!!!! Yes, the sleeve slips over my largest jacket, but JUST. When I make it in the coating flannel plus underlining plus windblock plus lining, it won't. I'm not saying I want 24" wide sleeves, but the armscye and the sleeve need to be enlarged. Question is, where do I enlarge them? Can I widen the sleeve at the top? the undersleeve at the bottom? The back sleeve, under the princess seam or above it? I want the sleeve cap to remain well balanced, and the back sleeve seam to match the back princess seam..... and I want the whole armscye bigger, for all that's going to be squished into it (bulky sweaters, jackets, and more) Advice, please!!!!
The last, but very minor thing I'm noticing is that the back seems a bit too wide for me. However, I figure that if I cut a larger sleeve it'll automatically sit a bit further into the back, and that'll cure this. The bust, waist, and hip fit are great. I could shrink the waist a bit, but I think I'll leave it as is: my professional-fashion-designer mom always said, a little too big is ALWAYS better than even a hair too small. And a winter coat needs room for all that's going to sit under it!
Optional pattern alteration: I intend to turn the back vent into a wide box pleat. In fact, because the fabric is a vertical pinstripe, I think I'll do the box pleat horizontally, as a humorous touch. Canadian winters, brrrrr! You have to experience that mid-February westerly blasting ice crystals at you when it's 28C below zero to know why I don't want that air sneaking up from below. This baby's going to keep me warm if it's the last thing I do!
Edited to show first muslin photos. I added some width (maybe a bit too much) to the left sleeve and lowered the armscye by 3/4". The added sleeve portion is hatched in red. The photos do sugggest that the coat's a bit wide in the upper back. I'd be happier if those vertical folds could be made to disappear. I'm wearing a suit jacket under the muslin. It seems fine elsewhere, and I like the feel of the widened sleeve.
Muslin first version front, right, left, back.
Lisette's second muslin Burda WOF 9/2005

Following Marji's advise I raised the waistline and let out the seams below the waist on the front princess seams. This removed the wrinkles on the sides above the waist. The front grainlines are also now okay and the hem edge is even so I didn't see the need for the fisheye darts. I consulted with Paco about the ease in this coat since he made it twice. He says it is designed with jacket ease to be worn with dresses and sweaters.
I put in the sleeves and the collar. I believe the grainline looks good on the sleeves. The photograph I took of the side where I did a forward shoulder adjustment(FSA) did not turn out so what you are looking at has no FSA. The sleeve has a good length.
The back shows a bump on the right hip, I think something is wonky on my seam there and/or the sweater I'm wearing it's causing it. I had my mother check on the back neckline and the seam was where it was supposed to be so I did no alterations there.

Does anyone see anything else I need to address? Thanks!
NancyK: Vogue 8306 muslin


Before I cut out my muslin I made my usual alterations to the pattern: forward shoulder, erect back, narrow shoulder and an fba of about 1.1/2" for a total of 3" in the bust. I also added walking ease according to Roberta Carr's instructions. I cut a 14 in the upper body and a 20 in the hips. I cut a 16 in the sleeves and took out about an inch of ease in the sleeve cap because, one there was over 2" to ease. Too much and especially too much for my heavy double sided wool coating. I also shortened the sleeve by an additional 1" They look to be the correct length. The hems are cut off, but not the cf sas.
The armscyes are too tight. I am wearing a t shirt with a sweater over it, about what I would wear in the winter. I sewed it lower and trimmed underarm after these pictures but I think that the problem is that I need to add to the upper sleeve not to lower the armscye further. Before I added the sleeves it felt fine. The underarm was not too high so it seems to be the sleeve ease. I also need to let out all the vertical seams and give myself a bit more ease under the bust to the hip. This pattern does not call for shoulder pads and it seems ok. I have to add the very large collar and lapels yet, but it would have obscured the upper body!


Sunday, June 29, 2008
poppy's mccalls 5513 muslin


Marji: Tips for Presenting Your Fitting Muslin
- As unnatural as it seems, stand straight - no Heidi Klum one-leg-in-front-of-the-other poses, as attractive as they may be.
- Get a full front shot (no 3/4 poses either, sorry), a full back view, and a side view.
- Make sure that you've stitched your armscye and neck edge seams. This serves to mark them as well as serves as staystitching. Trim enough of the seam allowance off of your armscye so that the seam allowance isn't pulling on your clothes, then clip to the stitching line at the underarm. (I did a bit of clipping on mine, but not enough, and left too much seam allowance - if you don't clip, just know that some wrinkles may occur, be wary not to read them as drag lines)
- Press your seams on your muslin, then try it on right side out.
- Draw your grain lines on each piece, in pencil or marking pen, anything that is visible, on the right side. edit to add:
- It would be very helpful if you could also add a pattern pic or preferably a line drawing of the style and view you're making.
- *Important: Cut off or fold under your seam allowances up the front
- and fold under and press the seam allowances around the neck edge, the ones that attach to your collar, if you're making your first fitting muslin without collar attached.
- Els has been writing this individually on everyone's comments, but I'm going to put it up here since it appears that everyone isn't necessarily reading everyone else's comments: PUT BOTH SLEEVES IN. Putting only one sleeve in unbalances the garment and pulls everything to one side. If your body fit is close enough to evaluate with sleeves in, then put in both. They don't need to be set-in pretty, there can be ugly little tucks where the ease is, just distribute your ease evenly where it should be - but PUT BOTH IN!
I invite everyone to post their fitting muslins as they get them started, and I invite anyone with constructive suggestions to post them.
Marji: Quick Survey/Roll Call
I'm trying to get a handle on the group's activity so far. I know of 10 participants who are in the muslin process, or are using patterns that are TNT and won't be starting a new muslin, or are continuing a project that is already in process.
That leaves, well, a lot unaccounted for.
How many of you are in the process of putting together a muslin/toile and will have it finished in the next week, or are using a previously fitted pattern? Leave a comment, please.
How many of you plan to have your muslin ready for fitting the last week in June? Again, comment, please.
I'll go through the next couple muslin posts that get put up, then after that I expect that what you're looking for in fit will be clear and the sew-along part of this venture can jump into action and everyone can help each other through the fitting analysis.
Tentatively I'd like to have all the muslin fittings finished by the end of June. However, since June is a busy month for many, it's unrealistic that all will be finished by June 30. I'd like to put a cap on it, though, so that the group can move forward as a whole: All fitting muslins that are going to be put up for group critique should be posted no later than July 15. If you cannot make this deadline and still would like a muslin critique, please post photos on your own blog to collect opinions, then leave a comment here directing participants to your blog.
I've made the commitment to have the next steps written up, illustrated and ready for blog publication by July 1.
My personal plans: I'm leaving town June 26 and will be off-line until July 7.
July 1-15
- Cut the fabric, underlinings/interlining, and interfacing
- Mount the under/interlinings
- Apply interfacings to fronts, and shape collar and lapels
- bound buttonholes
- assembling the fronts
- pocket treatments