
Marji's analysis of my first muslin is here.
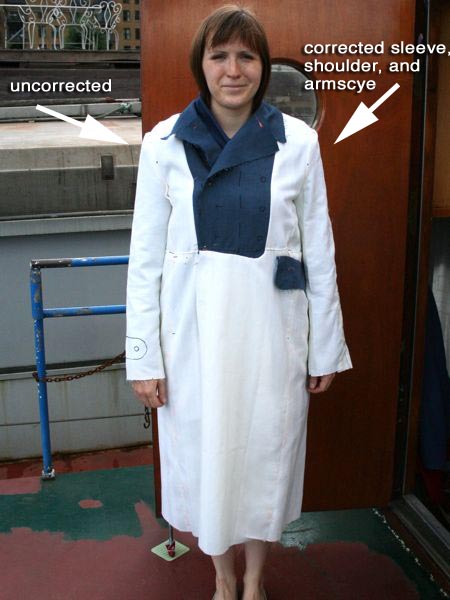
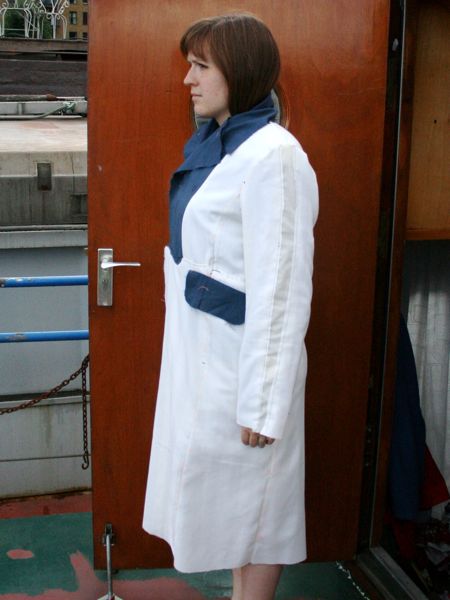
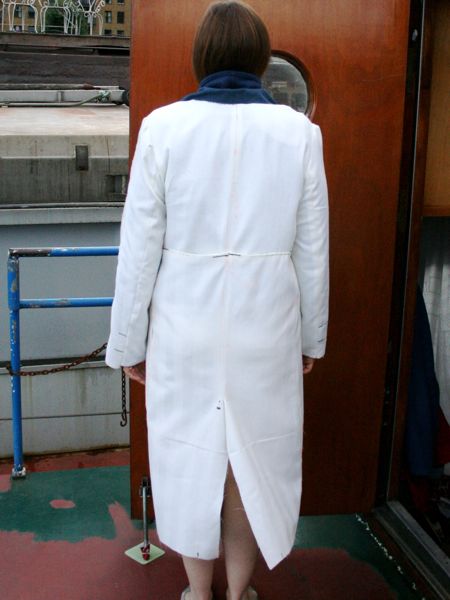
I first folded up the muslin and raised the waist to match my natural waist. Then I let out all the vertical seams by 1/4" (except in the front and back above the bust). Then I raised the shoulder seam by about a 1/2" (I didn't have enough seam allowance to let it out any more). And then I slit my second sleeve down the centre and added about and inch throughout the whole length.
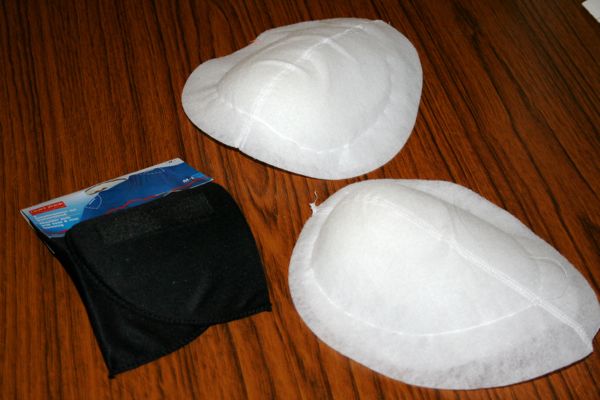
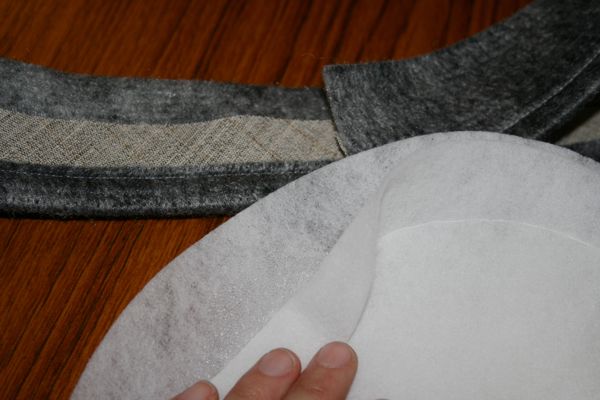
In these photos I'm wearing a thick fleece and my new shoulder pads (details below):
(NB: the wind is blowing the walking slit open in the last photo, disregard that)
I'm really happy with the fit of the sleeve now - it doesn't pull when I raise my arm and the bicep is much looser. I think I could still raise the shoulder a little bit more, so I'll cut the seam allowance a 1/2 wider in the final.
I'm still not sure about the body fit, though. It feels like a bit of a sack, and doesn't really have a defined waist at all (though frankly, it didn't much before either)...
Oh, and I took the day off on Thursday and did a bunch of shopping through the good haberdashery shops that are usually only open during the working week. I got some fabulous shoulder pads from MacCulloch and Wallis for £2, and sleevehead from Kleins for £1 a metre! I've got detailed shopping info on fehrtrade.com, and both places sell those bits online, too.
Saturday, July 5, 2008
Melissa's second muslin

Monday, June 30, 2008
Digs' Vogue 1266 "Siege of Stalingrad" coat


This pattern (Vogue 1266, view B, the double-breasted blue) is wonderful. I love everything about it - the length, the perfect waistline placement, the ease all over the body, the length, the swishiness of the skirt. It'll be a fabulous coat.
It has two issues with respect to my own quirks & needs:
1. That straight back thing. My neck is pushing the coat backwards - and this is apparent from the far-back position of the shoulder seams. My inclination is NOT to do the straight back adjustment, because it would shorten the back but leave the side seams where they are, and I'd then have to move them forward, probably as much as 1" (also in the lining pieces). MY inclination is to deepen the back neck and cut the collar piece a little longer to compensate for the extra neck seam length. Not such a bad idea since this coat's going to have jackets & winter scarves under it. This would automatically allow the coat to shift forward & get the shoulder seams where they should be. Could someone please weigh in on the overriding wisdom of one over the other????? :-)))))
2. For a presumptive winter coat, the sleeves are ridiculously narrow. Gorgeous, but wayyyy too narrow. I checked the widest part of the sleeve in my existing winter coat: 24"! This coat: 18.5"!!!! Yes, the sleeve slips over my largest jacket, but JUST. When I make it in the coating flannel plus underlining plus windblock plus lining, it won't. I'm not saying I want 24" wide sleeves, but the armscye and the sleeve need to be enlarged. Question is, where do I enlarge them? Can I widen the sleeve at the top? the undersleeve at the bottom? The back sleeve, under the princess seam or above it? I want the sleeve cap to remain well balanced, and the back sleeve seam to match the back princess seam..... and I want the whole armscye bigger, for all that's going to be squished into it (bulky sweaters, jackets, and more) Advice, please!!!!
The last, but very minor thing I'm noticing is that the back seems a bit too wide for me. However, I figure that if I cut a larger sleeve it'll automatically sit a bit further into the back, and that'll cure this. The bust, waist, and hip fit are great. I could shrink the waist a bit, but I think I'll leave it as is: my professional-fashion-designer mom always said, a little too big is ALWAYS better than even a hair too small. And a winter coat needs room for all that's going to sit under it!
Optional pattern alteration: I intend to turn the back vent into a wide box pleat. In fact, because the fabric is a vertical pinstripe, I think I'll do the box pleat horizontally, as a humorous touch. Canadian winters, brrrrr! You have to experience that mid-February westerly blasting ice crystals at you when it's 28C below zero to know why I don't want that air sneaking up from below. This baby's going to keep me warm if it's the last thing I do!
Edited to show first muslin photos. I added some width (maybe a bit too much) to the left sleeve and lowered the armscye by 3/4". The added sleeve portion is hatched in red. The photos do sugggest that the coat's a bit wide in the upper back. I'd be happier if those vertical folds could be made to disappear. I'm wearing a suit jacket under the muslin. It seems fine elsewhere, and I like the feel of the widened sleeve.
Muslin first version front, right, left, back.
Lisette's second muslin Burda WOF 9/2005

Following Marji's advise I raised the waistline and let out the seams below the waist on the front princess seams. This removed the wrinkles on the sides above the waist. The front grainlines are also now okay and the hem edge is even so I didn't see the need for the fisheye darts. I consulted with Paco about the ease in this coat since he made it twice. He says it is designed with jacket ease to be worn with dresses and sweaters.
I put in the sleeves and the collar. I believe the grainline looks good on the sleeves. The photograph I took of the side where I did a forward shoulder adjustment(FSA) did not turn out so what you are looking at has no FSA. The sleeve has a good length.
The back shows a bump on the right hip, I think something is wonky on my seam there and/or the sweater I'm wearing it's causing it. I had my mother check on the back neckline and the seam was where it was supposed to be so I did no alterations there.

Does anyone see anything else I need to address? Thanks!
Wednesday, June 25, 2008
Liana's Muslin - Fitting Part 2
For reference, here's the Marfy pattern I'm using.
(Working hard to get Marji's opinion before she leaves us to our own devices.)
I inserted the sleeves and the collar. (I love the collar!) Then I decided to narrow the back. I figured the pattern ease with their ideal measurements vs the ease with my measurements and found that I have more ease all around. I narrowed the CB seam by 1" at the bust, angling to 1 3/4" at the waist and hip. I also narrowed the side back seams by a little to make up the total ease difference. It turns out that I like the original better, I think. With the suit jacket on, the coat is too tight across the hips IMO, and although it's all right with just a blouse on, I like the drape of the non-changed silhouette better. So unless I hear differently, I think I'll make it up as is. I think in the cashmere, the back is going to drape much better than the muslin, and that will make a difference.
I worry a bit about the CF off-graining being too much, but again, you can't tell until you get it in the real fabric, and Roberta Carr says you can always cut it off with no ill effects, so that will be the first thing I check.
I do agree with the idea of a soft chest pad, although the sleeves and collar have helped a lot. I may put a little more padding on the right shoulder, at least in the back.
Here are many photos.
The first set is with No Changes and a Blouse underneath.
Back Narrowed and a Blouse underneath
Back Narrowed and a Suit Jacket underneath
Once again, all photos larger here.
Original post below. Should I delete this part?
There are horizontal lines at the waist and hip on the muslin although they're showing only faintly. I have the shoulder pads pushed out 1/2" out from the shoulder seam, which is marked also. The front edge is turned under and the hem is turned up. I have a suit jacket on under the muslin in the top 3 photos, and I realize that the collar is making those weird vertical lines, although originally I thought they were a hollow-chest thing. I have a low right shoulder, so I have a little extra pad (maybe 1/4") on the right.
All Photos Larger Here
I'm going to construct the sleeves but won't sew them in yet.


Sunday, June 22, 2008
Cafe Couture: Muslin fitting
This post concerns my first coat , the 3/4 one and the drawing is here below (click on picture to enlarge): Well, I must say that after cutting the musling and stitching all the parts together I said what a wonderful idea this was because I actually have a problem with the the size of the pattern: I cut a 38 size, which I usually cut in Burda magazines, but this is definitely too small. About two sizes smaller than toaday's Burda patterns I would say.


The question is that this is a 1974's Burda edition and the pattern in the magazine is available only in 38 size. The challenge now consists in making the right adjustments and I may need to read additional litterature about critical points when enlarging a coat pattern. It doesn't seem an easy thing to me so far.
I was wondering: are vintage patterns really smaller that today's ones? I do not really have experience with vintage models except some "baby doll" dresses, easily adaptable.As to my second coat, I cut the muslin but did not put it together yet. So, I'll be off until July 20th, I may start the second coat musln fitting by end July. See you all then.
Digs: McCall's 5247 muslin


Here's the muslin for my "little coral cashmere fall coat", McCall's 5247. Front, side, back.
I adjusted the seaming slightly to make it a little less like a sack of potatos: added 4 mm in the bust and hips at the front side seams and below the waist at the side seams, and decreased at the waistline at front side and back seams. It looks a little loose over a tee, but fills out well when I put on a long sweatshirt. The shoulder pads are placed at the sleeve seam line, and the neck folded down & pinned. The photos show me that I should've pressed the front side seams better (and that I need a new undergarment).
The muslin waistline falls about 1.5 cm below my own, so I'll pleat that up when cutting the fabric. I haven't quite decided on the final length, but I may cut it 5 cm longer to keep the length as shown here - I like coats to cover my knees, and I think the longer skirt will make it more feminine.
Should I deepen the back neck a little to allowthe coat to rotate forward?
My only issue with this pattern is that I believe the side front seams should fall closer to the bust point, and they are quite far to the side. I found this beautiful coat based on the same pattern, and it confirms the front & back side seam placement. So, I'd love some comments on "what if" I was to shift that seaming (both front & back, since they should match at the shoulder) towards the centre by about 1/2".
Tuesday, June 17, 2008
Lisette M's Muslin Burda WOF 9/2005 102
I have completed my muslin with the standard alterations I make: I added to the back waist length and I traced size 38 at the neckline, shoulders and armhole, 40 at the chest and from the waist down a 42( I usually trace a 40 at the hip but because KayY had mentioned not enough ease in this area I decided to go up). I am wearing a sweater underneath, I rarely wear jackets under coats and therefore don't need the extra ease for that.

I measured the ease at the hip and thought I had plenty (46 in) but I forgot this was a double breasted coat and as you can tell from the pictures I have no ease in the hip area.
Without the shoulder pads I thought I would need a forward shoulder adjustment but with the pads I don't think so, what is your opinion?
These pictures are without shoulder pads(as are the two above):

These pictures have a 3/8 inch shoulder pad in:


I did not add walking ease. This alteration was discussed in KayY post but the discussion was not finished. Is it recommended for a double breasted coat?In Power Sewing by Sandra Betzina she does not make this distinction and if it is recommended in this coat pattern to include the wedge in CF up to the neckline would cut right through the "bib" and therefore alter its shape.
I marked the welt pockets which will be covered by tabs but somehow I missed since the two parts (the welt pocket cuts across the seam line) do not match. Burda has you mark the welt according to your size on the side panel and then to join the pattern pieces and extend it to the front. I did that but did not turn out :o
I don't see any other issues in the fit but that is why I joined this great sew-along ...for all the extra eyes to appraise the fit!
After I receive your comments I will add the sleeves and update my entry.
Melissa's muslin and fabric prep
I made my coat muslin over the weekend and a few things were apparent to me in this first fitting. Most apparent is that I need much more ease in upper arm! I'm a textbook BWOF 42, but it doesn't appear like they've added any additional ease in this pattern than they do in their standard shirt/jacket/skirt patterns. So it fits ok if my arms are at my side and I'm only wearing a teeshirt underneath, but as soon as I lift my arms or wear something heavier underneath (as in the below photos), it's obvious that I'll need to increase the circumference at the bicep, and also add about an inch at the sleeve (I like the length as it is, but that's supposed to have the seam allowance in that, too).
Another thing I realised when I tried this on is that the horizontal welt pockets are just NOT going to work for me. They look fine, but I definitely need to be able to shove my hands in my pockets in a winter coat, so I'll be ditching the drafted pockets and using vertical inseam pockets instead.
Here's the photos. Apologies for the lighting - between the reflective zip on the jacket I'm wearing underneath (all of my winter clothes are in storage!) and the distance away my photographer had to stand in order to get the hem in shot, the flash was having some issues picking up all the details (you can click to get a bigger photo, though, or I can email hi-res ones if necessary).
Front view:
Standing like this, I'm pretty happy with the fit. I like the way the collar lays, and I feel I've got enough ease in the waist (and tons in the hip).
But when I raise my arms slightly to mimic putting my hands in the imaginary inseam pockets, my sleeve bicips really tightens up and I get bust draglines between my arm and my bust:
I have a book which shows how to adapt the sleeve pattern to increase the girth, but I have no idea how to correct for this bust pulling. I've never had to do any bust alterations before! Or is it an armscye issue? The sleeveless side seems to fit okay (though I don't have my shoulder pads yet to use here, there's definitely room for them in the shoulder).
The side view:
Everything looks fine to me here, and the sleeve seems to be hanging okay.
And the back view:
Everything looks okay to me here, too. The fabric is hanging on my bum a little, but that's just a friction issue that should go away with some slippery lining fabric underneath.
So to my eyes I think I just need to enlarge and lengthen the sleeve, change the pocket, and do something about the bust-pulling issue.
Last week I also did some draping experiments with my microfleece and wool coating (more on fehrtrade.com) and I'm really happy with the way they behave so I've decided to go with that. I've prewashed the microfleece, and I've cut a swatch of my coating and put that through the washing machine twice now (we don't own a tumble dryer, and we always use the very eco and very gentle soapnuts since our grey water goes straight into the river) with zero shrinkage, so I'm going to put it through a third time and really scrutinise the swatch vs the virgin fabric and take a view as to whether to machine wash the whole lot.
Thursday, June 12, 2008
Constructing and Fitting the Muslin, Part 2
Note: This is a work-in-progress post and will be updated frequently as I make changes.
[Excuse the early AM photos. DH got in last night from a 3-day business trip and I had to nab him to get some pics before he left this AM.]
There's work to do.
First try-on reveals several problems. I'll make adjustments one at a time, and start at the top.
- The slope on the shoulder is too great, and I need to change that. It's fine at the neck edge, but I'm more square-shouldered than this pattern. There is also no room at all for a shoulder pad in here, not even to try on for the first fitting. The dotted line on the shoulder in the second frame shows how I'm going to open this up.
The shoulder seam is angled just a tad too far back on me. (See detail photo below) I'll take a picture of the way that I change this. What I'm going to do is use some of that 2" seam allowance and move the shoulder seam forward
The pictures also show that I didn't do enough of an FBA. See the drag lines the arrows are pointing to? See how the waistline marking is lifting up from the side seam toward the CF in the 3rd frame? I'll add that, after I open up the shoulder and try it on again.
The back is showing some serious drag lines too, but I think a lot of that will be solved by changing the shoulder seam
 As always, if you click on the picture it should open up much larger on your monitor.

Fortunately, I haven't cut my sleeves yet. Because I'm going to add that much to the top of the armscye, I'm going to need to change my sleeve cap.

The original shoulder line is indicated by the stitching lines on the muslin. The yellow lines indicate me moving the shoulder line forward 1/2" to put it where the shoulder is on my body. The blue line indicates the 1" that I added to the outside of the garment to raise the shoulder—in part because even without a shoulder pad this was too much an angle on me, and it left no room for a shoulder pad.
After I moved the shoulder seam line, I added 1" equally to the front and the back. In the photos below the shoulder pad is recessed a bit, but not as much as it appears in the photo. You can see that opening up the shoulder took care of some of the issues with the FBA too.
 Next I cut open the seam line over the bust. It spread 3/4" upon releasing the stitches. When I look at it straight on, the front seamline is in the right place, so all of the additional fabric that I will need to add will have to come from the side front.
This is why I go through this process. Every time I think I've done enough flat pattern alteration, and it's going to be a waste of time to make the muslin, I'm proven wrong.
I invite everyone who's in the process of fitting their muslin to post photos to gain the input of those here who're sewing along—and no, you don't need to draw all over them like I have. I've found that the camera is a thousand times more revealing than my mirror when it comes to fitting. Do try to have someone else take your photos, or use a timer and a tripod (or shelf). Lifting your arm enough to take the photos yourself will distort your fitting lines.


