
Like Digs, I'm still working on my coat, but at least I'm making progress again!
I got as far as the material gathering, muslin fit and alterations, and even sewed together the body pieces of the coat before I lost momentum in August. The half-finished coat has hung in my sewing room ever since, taking up valuable space and making me feel bad every time I glanced at it, but the abnormally freezing cold temperatures we've had in London have made me jump back in with both feet to get this finished, because I could really use this on my daily walking commute to work. I've got a RTW long wool coat, but with the wind and extreme cold we've had, I can feel the cold through what I've got now (the papers are gleefully reporting that, at -10C, London is colder than Antarctica right now, and I've lost count of the number of Russian-style fur hats I've seen out and about).
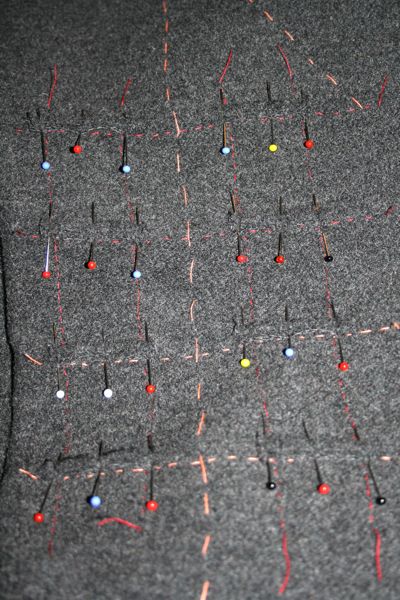
My biggest stumbling block, and the reason my progress halted was that in order to proceed, I had to make the bound buttonholes, which I've never done before, and quite frankly, was scared of. But I'd learned to make welt pockets recently and I figured these were essentially like tiny welt pockets, so that gave me the confidence to finally sit down and try.
Here they are as I pinned the first lips onto all the basted placement lines, with three pins per lip!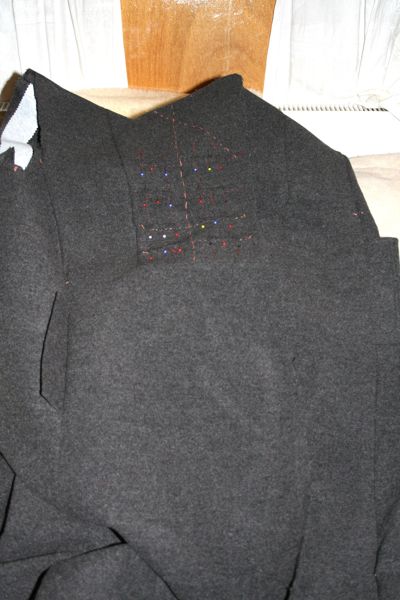
After making ten of these for this coat, I wouldn't say I'm an expert, but I'm certainly not scared of them any more!
Even back in May, I knew I needed to make this coat extra, extra warm to withstand my daily windy commute, and the way to make a coat warmer is to interline the body and upper sleeve with an extra layer. I decided on microfleece as my interlining of choice way back in June after discarding Thinsulate, if you recall... 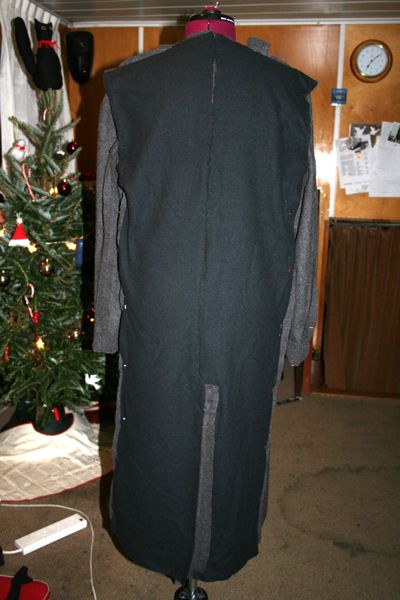
I won't lie to you - this took forever to hand sew (and I hate hand sewing!) so I'm glad I had several days off work to just sit on the couch with the dressmaker's dummy next to me to work on it. I certainly wouldn't interline every coat in the future, but for a long, thick coat like this, I think it's going to be worth it.
After the interlining was attached, I then inserted the shoulder pads and sleeveheads, and shaped and attached the collar pieces. 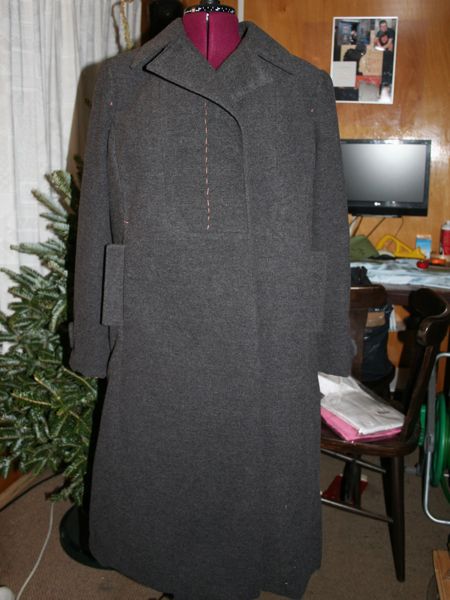
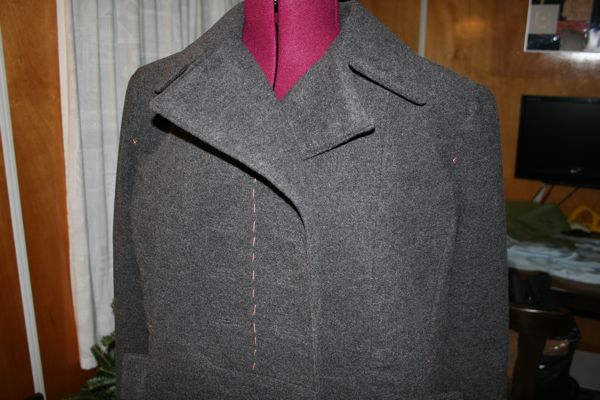
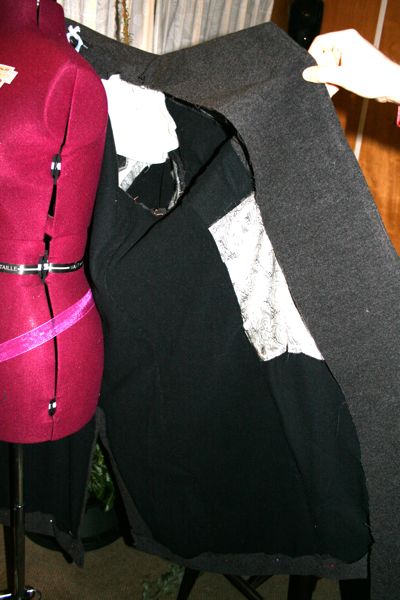
Notice how the white pocket bags in the third photo are on the interior side of the interlining so my hands should be nice and warm inside!
So it's looking like a real coat now, but I still have to finish constructing the lining, then I'll attach it by machine to the top and sides, and finally hand sew the hem and sleeve hems! If you're reading this and you haven't gotten as far along on your coat as you'd liked (and I've not seen anywhere near 100 completed coats here, so I know Digs and I aren't the only slackers!), then step forward and do something on your coat, anything, to get your momentum going again! I was once like you!
(I left out some bits here, so if you'd like to read the full account, head over to FehrTrade.com)
Thursday, January 8, 2009
Conquering bound buttonholes and interlining
Tuesday, January 6, 2009

MaryPat's Completed Coat
I finally finished my coat and proudly wore it to a friend's for dinner the first day!
.jpg)
.jpg)
The fabric is a mostly wool tweed in charcoal and brown with a copper fleck and lined in a grey/brown stripe. Both fabrics are from Emma One Sock and I believe were designed to coordinate. It is interlined with a flannel and has Kasha Satin sleeve lining to avoid bulk.
The pattern is an OOP Vogue pattern # 2449. I changed it considerably, but it was closest to what I wanted. It has a front dart, back princess seams, welt pockets and a back vent.
The coat I was wearing previously saw me through my last pregnancy and wasn't new then, so a new coat was definitely in order.
Thanks Marji for sponsoring this Sewalong. I haven't posted much, but have lurked a lot and wouldn't have gotten this done without it.
There are some more pictures of the completed coat and the construction on my blog if anyone would like to see more. http://merrypatter.blogspot.com/
Subscribe to:
Posts (Atom)