Like Digs, I'm still working on my coat, but at least I'm making progress again!
I got as far as the material gathering, muslin fit and alterations, and even sewed together the body pieces of the coat before I lost momentum in August. The half-finished coat has hung in my sewing room ever since, taking up valuable space and making me feel bad every time I glanced at it, but the abnormally freezing cold temperatures we've had in London have made me jump back in with both feet to get this finished, because I could really use this on my daily walking commute to work. I've got a RTW long wool coat, but with the wind and extreme cold we've had, I can feel the cold through what I've got now (the papers are gleefully reporting that, at -10C, London is colder than Antarctica right now, and I've lost count of the number of Russian-style fur hats I've seen out and about).
My biggest stumbling block, and the reason my progress halted was that in order to proceed, I had to make the bound buttonholes, which I've never done before, and quite frankly, was scared of. But I'd learned to make welt pockets recently and I figured these were essentially like tiny welt pockets, so that gave me the confidence to finally sit down and try.
Here they are as I pinned the first lips onto all the basted placement lines, with three pins per lip!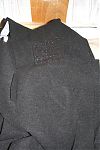
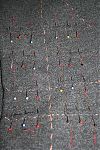
After making ten of these for this coat, I wouldn't say I'm an expert, but I'm certainly not scared of them any more!
Even back in May, I knew I needed to make this coat extra, extra warm to withstand my daily windy commute, and the way to make a coat warmer is to interline the body and upper sleeve with an extra layer. I decided on microfleece as my interlining of choice way back in June after discarding Thinsulate, if you recall... 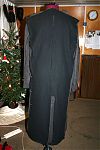
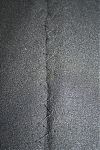
I won't lie to you - this took forever to hand sew (and I hate hand sewing!) so I'm glad I had several days off work to just sit on the couch with the dressmaker's dummy next to me to work on it. I certainly wouldn't interline every coat in the future, but for a long, thick coat like this, I think it's going to be worth it.
After the interlining was attached, I then inserted the shoulder pads and sleeveheads, and shaped and attached the collar pieces. 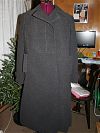

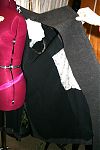
Notice how the white pocket bags in the third photo are on the interior side of the interlining so my hands should be nice and warm inside!
So it's looking like a real coat now, but I still have to finish constructing the lining, then I'll attach it by machine to the top and sides, and finally hand sew the hem and sleeve hems! If you're reading this and you haven't gotten as far along on your coat as you'd liked (and I've not seen anywhere near 100 completed coats here, so I know Digs and I aren't the only slackers!), then step forward and do something on your coat, anything, to get your momentum going again! I was once like you!
(I left out some bits here, so if you'd like to read the full account, head over to FehrTrade.com)
Thursday, January 8, 2009
Conquering bound buttonholes and interlining
Labels:
Burda WOF,
buttonholes,
interlining,
Melissa
Subscribe to:
Post Comments (Atom)

2 comments:
Way to go, Melissa!
I feel for you on the hand sewing and the bound buttonholes. Did you bind them with the fashion fabric? I can't decide if I should do that, or use a different fabric - like a firm black cotton-poly satin, for example.
I'm still working on mine, a little bit each evening. Let's see, I lapped the seams of my fleece interlining (separately from everything else) with a funny stitch that looks like a bunch of diamonds stacked side by side, and then pinked off the residual SA. This funny stitch gives a more flexible result than zigzag. Now I'm in the middle of pad stitching the undercollar. Still a few more steps to go before I put it all together and hem.
Your coat is beautiful. Show us the finished buttonholes, please!
Yeah, I used the fashion fabric for the buttonhole lips - they really bend in so they're almost invisible with the rest of the coat! I'm really proud of them, but on one hand, I almost wish I'd done contrast ones just to have something obvious to show for all that hard work, hahah
I'm hoping to have finished everything photos next week sometime. Fingers crossed!
Post a Comment