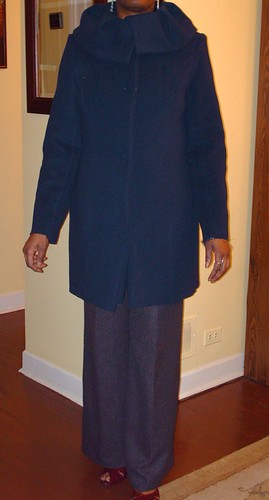
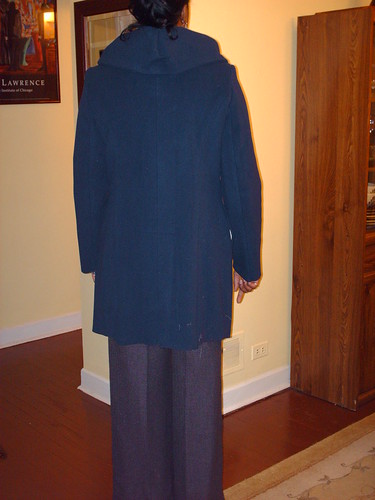
I am so pleased - I finally finished my coat.
........................................................Looking at Bradley(my dog :))!
The coat went together quite nicely with no complications.
The style changes I made were minor: I made bound buttonholes and made single welt pockets.

..............................................................................................................................................................................
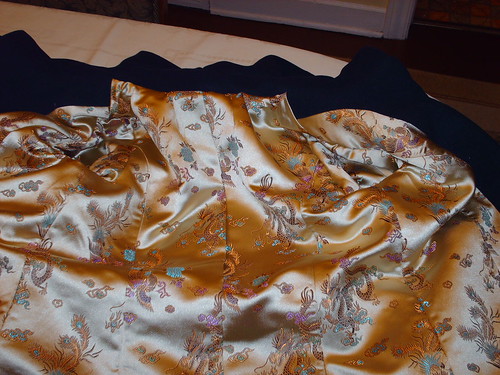
I used a decorative stitch on the lining hem and then sewed the lining to the coat by hand. (at the hems only!)
.....bound buttonholes and my buttons from
The Button Drawer.......single welt pockets


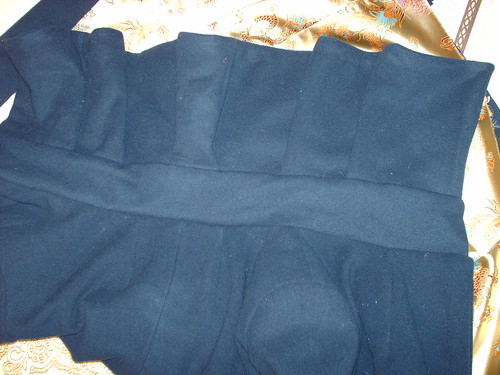
.........back vent detail. I didn't really notice the instructions for sewing the lining to the back vent - until I was actually sewing the lining to it. The pattern instructions for the vent would have you cover the vent opening, as illustrated in the picture. I didn't care for this, so I ended up modifying the flap lining. I clipped into the lining so I could then stitch the lining around the opening. I've done
this before and so I'm pretty sure that the look I ended up with for this vent is not how it should end up looking like - however it's the best way I could think of to finish it, so the vent flap could freely open without being attached to the lining. It's also a shorter vent since I shortened the coat by 3 1/2 ".

I'm very very happy with this coat and I love the fit. I'm so pleased how it turned out and even more pleased with the fantastic information I gained from -
Paco's and
Tany's tutorial - Thank you so very much to you both for sharing your time and valuable information!
Marji - Taking this project on was a huge undertaking and you did a fantastic job. Thank you.
It was a pleasure having so many people from all over the world come together for such a project. It was fun and I enjoyed seeing everyone's jackets come together.
More posts
here!


